Whether you’re bringing in a teammate, collaborating with an agency, or inviting a guest author, adding users directly through your WordPress dashboard is the safest and most efficient way to manage access.
This guide walks you through the process and helps you assign the right user role from the start—so everyone has what they need (and nothing they don’t).
✅ Step 1: Log in to Your WordPress Dashboard
Visit your site’s login URL (usually something like yoursite.com/wp-admin) and enter your admin credentials.
🔐 Important:
Make sure you’re logging in as an Admin-level user.
Check “Remember Me” for easier access next time, and consider saving your credentials in a secure password manager (like LastPass or 1Password).

✅ Step 2: Navigate to the Users Section
From the left-hand menu in the dashboard, click Users, then click Add New.
📍 Location: Users > Add New
✅ Step 3: Complete the New User Details
Here’s what to fill out:
- Username: Keep it simple and easy to remember. We recommend using the person’s first initial and last name (e.g.,
jdoe). ⚠️ Note: Usernames cannot be changed once created, so double-check for typos! - Email: Use the user’s primary, regularly-checked email address.
- First Name / Last Name: Self-explanatory, but helpful for sorting and attribution.
- Website: Leave this blank.
- Password: Use the auto-generated password provided by WordPress.
- ✅ Make sure “Send the new user an email about their account” is checked. The user will get a welcome email with a prompt to create their own password.
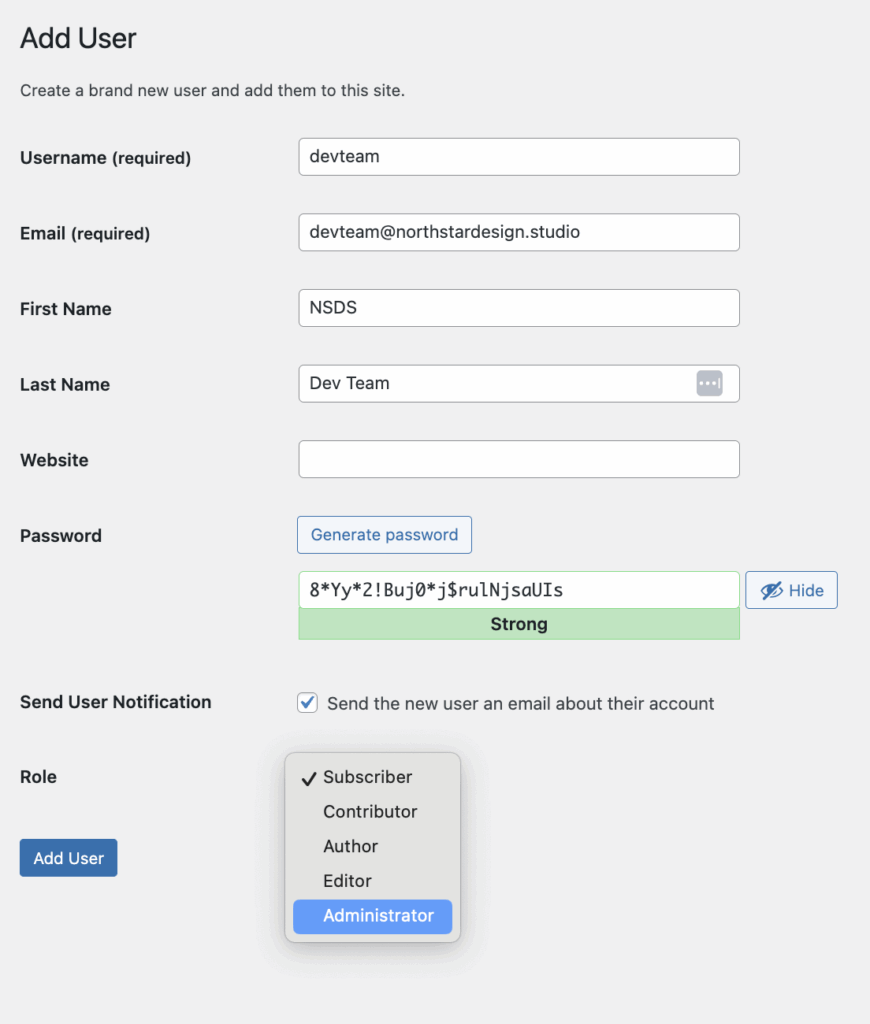
✅ Step 4: Assign the Right Role
WordPress offers several user roles, each with different access levels. Here’s a quick breakdown: (
| Role | Who it’s for | What they can do |
|---|---|---|
| Administrator | Site owner / web developer | Full access to everything, including settings, plugins, and users |
| Editor | Content managers | Create, edit, publish, and delete any posts or pages |
| Author | Blog writers | Create, edit, and publish their own posts only |
| Contributor | Guest writers | Submit posts for review (no publishing rights) |
| Subscriber | Basic users | Read-only access; can manage their profile only |
🔧 Need API or plugin support?
If you’re giving access to someone handling design, integrations, or tech support, Administrator is usually required.
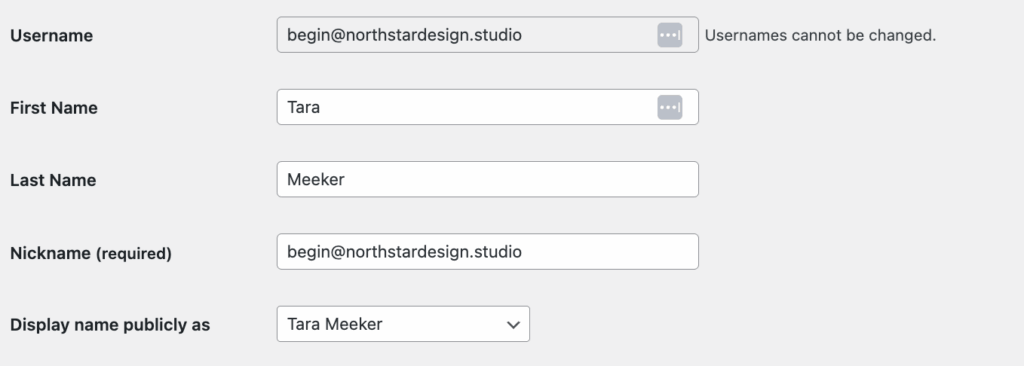
✅ Step 5: Customize the Profile (Optional but Not Always Nescessary)
Once the new user is created, head back to the full Users list:
🔗 /wp-admin/users.php
Click on the newly created user to edit their profile.
- Nickname: Choose something professional or branded (e.g., “Jane from Support”)
- Display Name Publicly As: Use the dropdown to select the nickname you just added. This will control what shows as the author name on posts or comments.
📸 Want to be real fancy?
You (or the user) can also upload a profile photo—a great touch for authors, team bios, or contributors. Most user roles allow individuals to update their own profile image and basic display details once logged in.
💡 Pro Tip: Manage Roles, Not Passwords
It’s always better to add users with the right role than to share your login credentials. This keeps your account secure and makes it easy to revoke or adjust access later without disrupting anything else.
Need more clarity on how SOPs like this protect your site and your team?
📘 Read: Your North Star SOPs That Empower Your Website, Support Your Team, and Strengthen Your Business